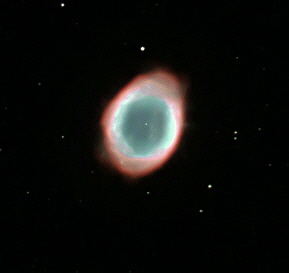
If you have not chased down a deep sky object before, doing just a little preparation may prevent massive frustration under the stars. Deep sky objects can be rather dim and fuzzy-looking, so donít expect something that looks like the image on the web page. Human eyes simply donít see color well at low light levels. In finding these objects you have a chance to experience them with your own eyes. The photons that tickle your retina have been traveling through space for thousands or even millions of years. No one else can see the photons that strike your eyes Ė they are for your eyes only. Viewing these dim objects is like seeing the lights of a majestic ocean liner far out at sea. Do your homework. It helps if you know at least some of the constellations. Have a good star chart handy. I recommend Sky and Telescopeís Pocket Star Atlas (available at Barnes and Noble) for this. Learn where the controls are on your telescope, and how to operate them, in broad daylight, before you try to find them at night. Use a red flashlight at night to avoid spoiling your night vision. Allow your eyes at least 30 minutes to dark-adapt. Most beginners do not realize what a difference light pollution makes in the visibility of deep sky objects. If you live in town, consider an ďexpeditionĒ to a dark site 30 miles or more away from the city. The resolution of your telescope will remain the same, but when it comes to the visibility of faint nebulae and stars, you can effectively double or even triple the size of your telescope, compared to the light-polluted view. Align your finder telescope or pointer. One of most frustrating situations that occur when finding deep sky objects is when your finder telescope or laser pointer is not aligned with the telescopeís optical axis. This can cause you much lost time and effort. If you have not aligned your finder telescope, or havenít done so for a while, take your telescope outside in the daylight and point it at some conspicuous object Ė say the top of a telephone pole, for instance. No - not the sun - move away from the sun. Even a brief look at the sun can permanently blind you. The farther away the object is, the better. Make sure that when the top of the pole is centered in the finder, itís also centered in the low-power eyepiece field of the telescope. If not, play with the adjusting screws on the finder telescope or pointer until it is in the center of both. Finally, before it gets completely dark, aim the telescope at a bright star or planet and repeat the alignment procedure. That way, when you aim your finder telescope at the spot where the Ring Nebula should be, it will be centered in your telescopeís field of view. Start out with low power to find your object, but donít be afraid to try several magnifications. Objects like planetary nebula and globular clusters benefit from fairly high magnifications, while large dim nebula may best be viewed with a low magnifications. A great way to learn about deep sky objects, and to learn your way around the sky, is to set a goal of seeing the 110 objects in the Messier catalog. Some of these objects are visible to the naked eye (like the Pleiades), many are visible in binoculars, and all can be seen with a 2" aperture telescope from dark skies. Although some try to do this in a single night, (a Messier Marathon) I think it may be more enjoyable to take your time, keeping a log of when you saw each object, where you were, who you were with etc. This way gives you more time to savor each object. Finally, donít be discouraged if you canít see a particular object. Instead, consider it a chance to learn the star field of the object, and try again on another night. Persistence is usually rewarded, and sometimes the object that is hardest to see is ultimately the most satisfying.
|
